Search This Blog

Friday, July 29, 2011

For a change

I am taking a break from my usual stairway project from beyond to share with you a quick and fun craft project.  My sister and I had a girls' crafting weekend last month.  We met halfway between Oklahoma and Mississippi in Little Rock, Arkansas.  One of the projects we were able to accomplish in a hotel room was making "backdrops" for her grandaughters' American Girls dolls.  All 3 of the girls play with their dolls for hours, so this was the perfect craft for us. 

They were really simple to make.  We used bi-fold project boards that are made of foam board.  I believe that the size was 22 x 28 inch.  You can pick these up at office supply stores for under $5.00.
For the "wallpaper" we used 12 x 12 sheets of scrapbooking paper.  It takes 8 sheets per "room."  We used a coordinating ribbon to form the "chair rail" where the 2 papers meet.


pink and orange bedroom - as requested


pink/black/zebra bedroom - request number 2
 Then we hit the scrapbooking area for accessories


We found these little cork boards at Hobby Lobby - they actually hold pushpins.  The little metal frames are scrapbooking.  We cut words out of scrapbook paper and framed them.  Then just hot glued it all to the board.
The mirror is from the candle section at Hobby Lobby.  Half price it was 75 cents.  We gorilla glued it and then embellished it.


We found metal clock faces on clearance in the scrabooking section.  The purses are stickers.  The "shelf" is a piece of packaging styrofoam with ribbon glued on it.
(please excuse the crappiness of the cell phone pictures)

We found these little wooden containers on clearance for a quarter each.  So each girl got one to match a room to hold all the little pieces that accumulate for dolls.  We just glued the paper on and my sis modge podge them when she got home.

We were able to make 6 rooms.  2 for each girl.  They were super easy, and sooo much fun to create.  The best part is - the girls love them!!!  We have plans to make each of them a kitchen one next time we get together.  Martha Stewart makes the cutest kitchen-y stickers that we have been stockpiling as we see them.

One of my friends is going to have each girl at her daughter's birthday party make one.  What a great idea!!!

The only down side - my grandson really would not appreciate it if I made one for him!!!

Happy DIY'ing

Susan

Tuesday, July 26, 2011

Well this is another fine mess you've gotten us into


look at those pants - want to do my laundry

We removed a few more spindles around the landing.  Have you ever sanded over your head.  Even with the dust bag - yuck.  I think I may have eaten my weight in sawdust tonight.  


And the funniest part is yesterday I could not stand it anymore and vaccuumed,scrubbed, and mopped this area.  Not very well thought out.  At keast I managed to get the handrails and baserails of both sections stripped and sanded with 60 grit.  I will fine tune it with the 100,220, and 320 tomorrow.


These are the 2 sections I was able to get done.  Unfortunately I could not do this section yet:

If we took down all the spindles at once there was no stability to the handrail.  Youngest daughter's room is upstairs so she is up and down a few million times a day and we just did not feel comfortable with it.  I am still in awe of people who can refinish their stairs so quickly.  I am seriously doubting my idea that i should have just jumped right into the DIY with such a big project so soon.  My uncle suggested that maybe I should have started with a picture frame or something.  Funny man!!  At least I have learned alot - and I mean alot!!

And my kids are so encouraging.  They say the sweetest things like:

"Wow - that is amazing!  It looks just like it did before."  Oldest daughter on Nonnie's china cabinet.
"This is so cool - you made the laundry room match the buttons on the washer."  Youngest daughter on laundry room redo
"Man - these stairs are awesome! They feel like a baseball bat."  Son-in-law on stairs in mid progress.
But perhaps the best comment goes to youngest daughter's boyfriend. "You are getting really, really good at all this home improvement stuff.  You are not making anywhere near as big as a mess as you did last week."

Really!!??!!

Kids for sale - cheap!!!

Happy DIY'ing!!

Susan

linking up here
http://www.creativekristi.com/


Saturday, July 23, 2011

You newell it was coming

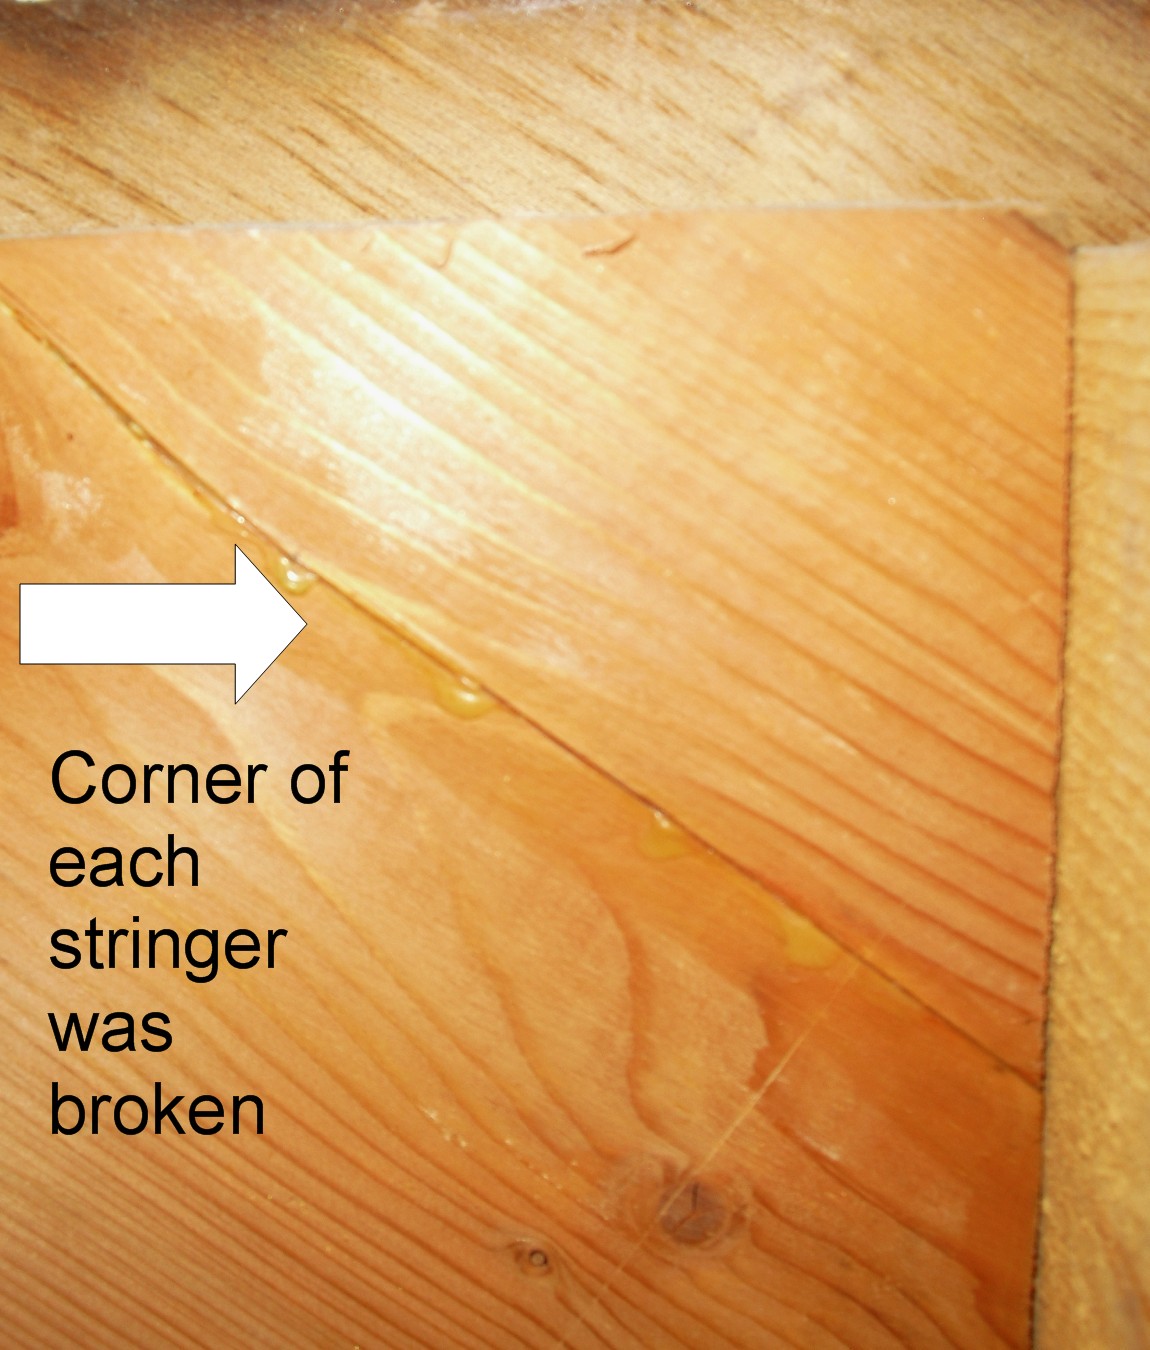
Since we were strengthening and suring everything up - we tackled the rather wobbly newell post.  First we anchored it to the stringer. First we drilled starter holes with the frochner bit so that we could counter sink the screws.  Then we screwed it in with three 4 inch decking screws to the stringer.  Sturdy!!!  Then we put wooden plugs in.

With the plugs unstained - ignore the sawdust on the ground

After stain and varathane - really not noticable from a distance
But we had another problem with the newell post

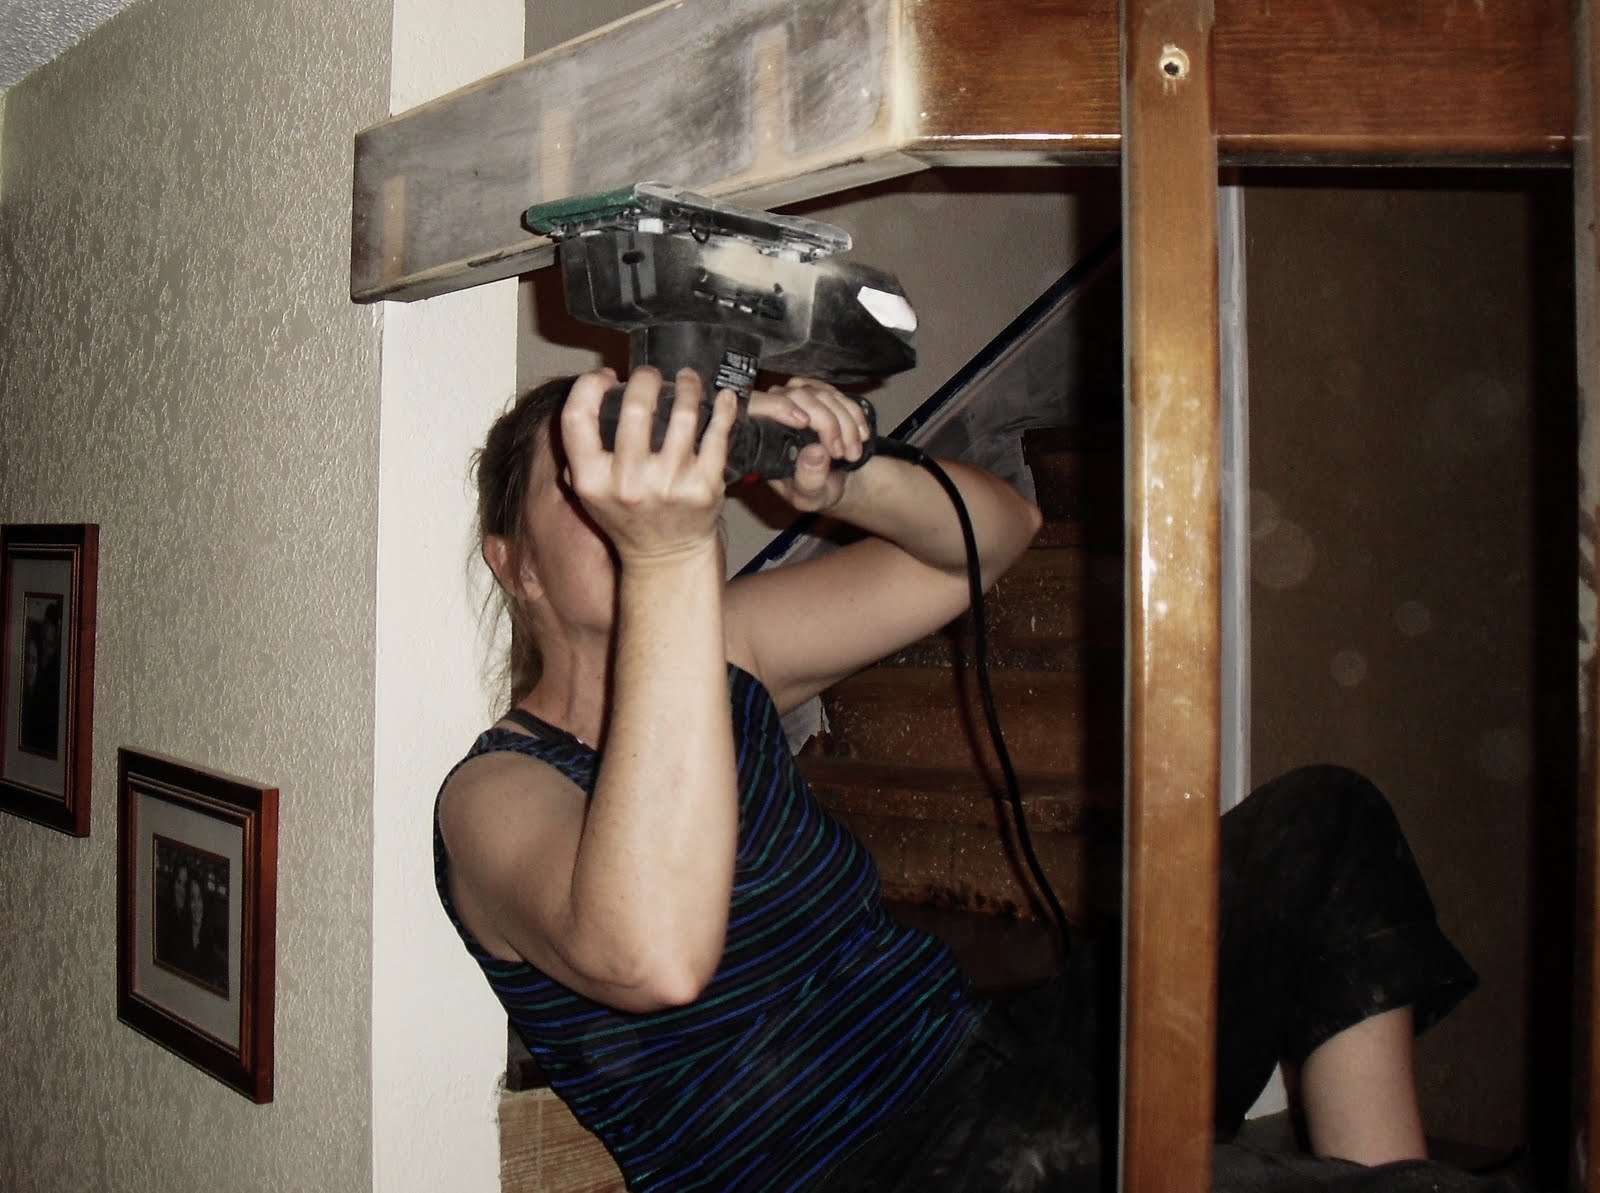
The piece of wood between the newell post and the new riser is part of the old tread that somehow became fused to the molecular level to the newell post.  There was absolutely no prying it off.  So using the handy dandy mutli max dremel I shaved the old nasty wood back.  Honey cut a piece of oak to fit and using sandpaper rounded the edge to match the curve of the newell post.  Then I stained and varathaned it

Again - ignore the saw dust.  Even though it shows up in this picture, it does not in person that much
Oh and notice the BEATIFUL tread - He He.  We also cut off a section of bull nose from some of the tread we had cut off and glued it to the front of the old tread and I re-varathaned it.  You cannot see the seam at all.  Ahh - so much better!!

And if you were wondering if we were still hot


Yep - its hot!!!


We had all the kids for dinner tonight.  And by dinner that means that they start showing up around 2 in the afternoon.  Gotta love it.  We don't get a whole lot done around here, but like I have said before -  I would not trade these days for anything!! 
c
 We had a blast!!  I cooked everything that each of them wanted which led to grilled chicken tacos, spanish rice, corn, seasoned pintos, hot dogs on the grill, cole slaw, and baked beans.  My kids are so wierd - HAHAHA.  Ok - maybe they are just spoiled.  I have no idea who would have done that to them.  We also made Butter Beer (from Harry Potter) to finally celebrate the fact that they all went together to the opening of the movie.(  No - they did not camp out, but yes they got there 7 hours before the movie started to make sure they got good seats.  )  The Butter Beer was a huge hit!!  We made 2 gallons.  The kids said the taste was close to what they had at Universal, but ours had a creamier texture.  And being the good kids they are - they said mine was sooooo much better. 

Here is the recipe we used from here


ce-Cold Pitcher-Perfect Butter Beer5 Cups A&W Cream Soda (Chilled)
3 Tablespoons Imitation Butter Flavoring
1 Cup Butterscotch Syrup
1 (12 ounce) container Cool Whip, thawed
Directions:
In the bottom of a large pitcher, pour in the butterscotch syrup. Add the three tablespoons of butter flavoring and one cup of the A&W Cream Soda and mix well. Set aside in the refrigerator to keep cold.
In a small mixing bowl, combine 1 cup of the whipped topping with 1 tablespoon of the Butterscotch Syrup. Mix well. Mixture will be too thick to pour at this time. Add in enough of the A&W Cream Soda to thin it out, without making it too soupy.
Pour the remaining A&W Cream Soda into the pitcher. Let the soda settle. Serve in individual glasses and gently top each glass with a dollop of the whipped cream mixture to form the foam.
Serve immediately. Do not store.


Perhaps a few calories here.

Oh and I learned a valuable lesson today.  Do not dress your 4 year old grandson in a totally precious new outfit and then give him fresh black cherries.  Trust me - learn from my mistake.  You also might not want him on the carpet unless you plan on replacing it very soon.

Well hopefully the kids and weather will cooperate tomorrow and I will get a bit more DIY'ing done.

Happy DIY"ing!

Susan

Wednesday, July 20, 2011

a day off from the stairs

Today for the first day in a long time - I did absolutely nothing on my stairs.  But I had a blast!!

After work I met my friend Cindie for lunch and a much needed day of fun.  Cindie is battling the C word.  She has faced with such bravery and such a positive attitude - I am in awe and honored to call her my friend.  This has been a really rough month for her with her treatment so she really needed a girlie day.  And what a day we had!!  We went here

Ketch design center
They do not allow pictures inside - but here is their promotional video to give you an idea of how much fun we had

http://www.youtube.com/watch?v=zfVmqYD0dlY&feature=player_detailpage

Cindie wants to re-do her formal living room and asked me to help.  WOW - spending someone else's money is soooo much fun.  But unfortunately we are the blind leading the blind.

Thank goodness when we first walked in we were greeted by our own consultant who worked with us for hours!!  Awesome.  we just walked in off the street, this is how they treat everyone.  We aorked with him for hours  - still no decisions, but lots of samples came home.

And the amount of material they have - made my heart flutter!!  Rooms - huge rooms - of samples and sample books.  Be still my heart.

I have absolutely no affiliation with Ketch's, just love to shop there.  They can get pricey - the first fabric we looked at was $270/yard.  GULP!!!  But after seeing the color drain from our faces he took us to the section that started at about $10/yard.  My kinda guy!!!  They even have their own fabric line that is mid range - $30 - $55 a yard.  But ooohhh soooo gorgeous.  I could spend a week just looking at the samples in one room. 

We really enjoyed our day tremendously - but the heat just saps everything out of you.  We Okies are really not used to this and the heat dome shows no sign of leaving.  Sigh...  And you know it is hot when a church bulletin board says:

Satan called - he wants his weather back

Oh - so true!!!!


Happy DIY'ing

Susan

Tuesday, July 19, 2011

Stringing along

The Laurel and Hardy rebuild chugs along.  Two words - the stringer.  I showed in an earlier post how the entire center portion of the stringer was made from a twisted piece of wood.  When I was taking off the treads the tip of each stringer on the right side would fall off.  Honey thought it had to be something I was doing so he gave it a try.  Guess whaaaatt.... it was not just me. (No gloating here, hee hee)

Our ever so wonderful builders had broken the tip off of every single one.  Some of them had a feeble gluing attempt made as repair, some had a nail, and some staples.  Augh!!  So we cleaned each one and guled and screwed them back together.

And then because the new treads are one inch thick and the old ones were two inches thick there was a gap in the baserail that would show.  So I measured out the angle of the baserail - uhm  hello 10th grade geometry, wowza - and cut 8 little triangles of wood to fill the gap.  I had to work them in between the stringer, glue them, and then tape them to hold them while they dried.


Since these will be painted, after they dried overnight I spackled and sanded them.  I forgot to take pictures of this step, but since I still have to do all of the upper stairs the same way.  There unfortunately will be plenty of photo ops later.  Augh!!


And then to top it off , none of the stringers were level
Break out the new dremel tool - this has been the handiest tool in this project!


Scrape and measure with the level, repeat, repeat , repeat.  Oh yeah, and repeat!!


But now we have a nice level, sturday, and safe base for our new treads!!  Woo hoo!!

Happy DIY'ing!!

Susan


Sunday, July 17, 2011

Landing

Except for a few more coats of varathane - the landings are done!!  woohoo!  (Well at least the floor portions that is)


The upper landing went much better than the lower.  It was actually mounted the way it should be, and close to level.


 This picture (above) actually comes the closest to showing the true color.  It is very hard to take a pic of the stairs with out the flash because there is never enough natural light


It was quite the debate on what "flooring" to use on the landing.  I knew that I wanted the same bull nose on the landings as was on the treads.  We looked at unfinished red oak flooring.  The only store here that carries it calls it "rustic" grade.  Uhmm - I could think of another grade.  Ick!!  It was some yucky looking stuff.  And you had to buy it in wrapped bundles - as in you could not even actually see the ones you were buying.  We would have had to buy 2 bundles and have alot left over.  Assuming it was all usable, and by the looks of the samples, I would not really want to assume that. 

Then we ran into the issue that if I used a tread on the lip of the landings, there was nothing else we could find that was an inch thick.

So - I went back to Lowe's and bough 6 more treads.  We ripped the bull nose off of them and that became our flooring.  Honey and I measured and re-measured and then cut the treads to fit in the landing.  And I mean fit.  There is only 1/32 of an inch gap on the lower one between the treads and the baserail.  The upper one has a slightly larger gap, but will have basboards to cover it.  Woohoo!!! 

We used liquid nails to glue them to the plywood and carpenters glue to them to each other.  On the upper landing we screwed them in with decking screws on the 2 sides that will have the baseboards because the screws will be hidden.  On the lower level there will be no baseboards, so we used finishing nails and a punch and counter sunk them.  Then I covered those with putty. 

I did not have time to stain them before they were put in - I did not want to take advantage of honey's generous mood.  I would highly recommend that if you are ever doing stairs, stain everything before it goes in.  Youngest daughter has been playing hopscotch to avoid my working areas all weekend.  And it is much easier to have everything on the saw horses than to be curled and twisted to reach all the corners with out touching what you just stained.

But the results are great!! 

Happiness!!


Happy DIY'ing

Susan

Thursday, July 14, 2011

Why I will be cleaning house for 2 months after we finish..

Need I say more?

Me:  "Wow that dust collection bag really does not work well."
Honey:"Oh - it had a hole in it, but I did not feel like returning it."

Really!!??!!

But to explain.  The landing was in horrible shape and my sander was not working fast enough so honey bought


This is one powerful sander.  It took me for a walk across the landing.  It works like a champ though and plows through anything.  WOW.  Just check the dust bag before you - or honey - uses it.

There is almost no way to tell what all was wrong with the landing.  First of all, the header holding it up was not attached to anything.  Seriously, the entire landing was being held up by 2 large nails.  Scary.  Honey solved that - it involved a truck jack-yep, you heard me right, new bracing, and a new support structure.  Oh and to build said support structure Honey bought


Because the little 20 year old black and decker we had is about worn out.  Actually - it was a great purchase.  It is much easier to control, has variable speed, and lots of features our old one did not have.  I likey!

And for those of you keeping count that is
2 sanders
2 saws
1 multi max tool

all purchased for this project.  Yikes!!

After Honey had secured the landing to the point a herd of elephants could stand on it, we worked on getting it as level as possible.  We used the belt sander to shave off a generous amount of wood on one side.  It worked very well, the belt sander takes no prisoners.  Hopefully soon we will get back to the beautification portion instead of the structural boring but necessary portion. 

Hope all is well in DIY land

Susan

Oh and one more for laughs

Bring your vaccuums, microfiber cloths, mops, whatever you have and come party in the hollow!!


Check out Kristi's new party - it is for projects you are working on - Awesome!!

http://www.creativekristi.com/

Creative Kristi

Wednesday, July 13, 2011

Laurel and Hardy strike again

Oh the continuing saga of the Laurel and Hardy staircase re-do.  Among the errors that we have uncovered in the original construction - and by we I mean Honey - was one that really explained why the handrail felt so wobbly and insecure.  The hand rail is attached to the baserail by the spindles so once I removed the spindles the hand rail should have gotten more wobbly.  Well - guess whaaaat - it did not. 

So Honey investigated and discovered that the baserail was only attached to the wall with one finishing nail at each end.  Yep 2 tiny little nails. 

So Honey got his forshner bit out and drilled holes at the stringer going down the baserail.  We inserted 3 inch deck screws and covered them with wood plugs then sanded the plugs flush  with the baserail.  It is not 100 percent attractive but it is definately stable


This is what it looks like with just the plugs, before staining


This is the baserail and plugs stained - no poly yet.  Most of them fade rather well


Even though it is alot of work, I am glad Honey was able to make sure that it is more than just "pretty" when we are done.

Stay tuned for more adventures of Laurel and Hardy!!

Susan

Tuesday, July 12, 2011

What's wrong with this picture?

So it has been a busy few days down in the hollow - not to mention very hot days with more and more records broken as the "heat dome" sits over us.  Yuck!!

But onto the DIY progress - which is now DIO - do it ourselves - as Honey has jumped in to save the day help.  As I started ripping into the project there were more and more original construction errors that he was freaking out concerned about.  He knew that I was now in waaaay over my head.  So we have spent the last 3 days trying to correct these and I will do my absolute best to explain them.  We have made a ton of progress - but unfortunately none of it is really visible.  Unfortunately there are so many errors that it will be more than one post on this topic.


What's wrong - picture 1

This is not a true before picture - this is the very first riser on ground level.  We had already replaced it because the original riser did not touch the newel post and only touched the ground in 2 little spots.  What is still wrong - notice the bow in the 2nd riser and the lean in the stringer.  The entire center stringer had been made from a twisted piece of wood.  There was over a 5 inch shift to the right from bottom to top.  And every other tread had that same bow to it. So honey designed a bracing system to try and straighten it out and give it some stability by connecting it to the concrete


bracing system, plus notice the top tread support has 3 pieces of wood now.  We glued and screwed those in to try to add stability and to striaghten the ones that were the most twisted.  It seems to have worked


Bracing system - we added to the stringer at every other tread support.


Doing this took a ridiculously long time - but it will be worth it.  The stairs are actually level now and you can actually feel the difference in the "stability" as you are walking on them.

Oh - but before we got to this point we had to deal with this:


What's wrong with this picture 2


Garbage under stairs left by builder

EWWWWW...We expected some debris - but this was ridiculous.  There were BOXES of trash.  Most of it would not have even been used in this portion of the house.  So they obviously brought their trash there and sealed it into the stairs rather than take it and dispose of it - there were paycheck stubs (so now we know who you are...) food wrappers, cable and electrical trash, lots of insulation, about a 5 inch layer of sawdust, wood scraps, sheet rock, shingles - you name it - we found it.  To this degree

1 of 4 bags we hauled out - hey do you think this could count as the July decluttering update at Noni's?

But Honey was so sweet about this - he knows my germophobic self would have had a melt down soo he did this

Notice the gloves - smart man.  This was almost an hour into the clean up.  really, really gross.  But on the happy side - as honey said - there were zero signs of any creatures - like spiders namely.  THat would have sent me over the edge.

Well (as my daughter calls this)Laurel and Hardy build a staircase  updates will continue soon with all our trials on this. 

Hope all is well in DIY land and you are all staying cool!!

Susan

Wednesday, July 6, 2011

An evening with the kids

I guess that you know from the title I did not get much done on the stairs today.  I sanded a few rough spots on the spindles and touched up the paint.  That's it.  Not much.

But we had a great evening with our youngest daughter and her boyfriend.  The guys grilled chicken while us gals made spaghetti sauce and all the fixins.  I love still being able to spend time with the kids.  One of these days - really soon - we will be empty nesters and the stairs (and all the other projects) will still be there.  So if the kids want us... projects get put on hold.

And I may have mentioned that I am a bit OCD sometimes about the house.  Well it was really getting on my nerves so I had to organize something.  So while we were visiting I tackled the kitchen.  The spices were all askew - now they are alphabetized again.  My kids loooove to rearrange them to mess with me.  I got all the small appliances wiped down and their respective shelves scrubbed.  Cleaned out and organized the tupperware cabinet and the baking cabinet.  I also gave both a very generous purge.  Maybe one of these days I will actually get it down to what we really need.  Most of the kitchen cabinets are all scrubbed out and the shelf liner cleaned and replaced.  I use that type that is removable but "grips" the shelf.  Grips may be too strong a word, though.

So I had a wonderful evening with my daughter - and got a really clean kitchen.

And guess what - the stairs are still there!!

Oh and we had great news from our oldest daughter today.  She received an "extra" scholarship today that she was not expecting.  She is transfering this fall to do her clinicals for her BSN.  She just received more $$ today for having a GPA of 3.0 on her bachelor's studies.  Woo hoo.  Youngest daughter has a full academic tuition waver for her first year.  What to do with the money we have saved.  Double woo hoo!!

(Sorry - proud momma moment - had to share)

I will get nothing done tomorrow night either - it is our Bible study night.  Sooo hopefully this week-end I will be back at it.

Hope all is well with everyone
Susan

Tuesday, July 5, 2011

Just a small update

I hope you all had a wonderful and safe Fourth of July.  Our family certainly did - filled with friends, food, and fun!!  It was a wonderful day!!  Only down side was the extreme heat - we have been hitting way too many records here - record highs, record high lows, most days over 100 degrees in June - well you get where I am going with this.  Let's just say it is TOO HOT!!

The stairs are progressing - ever so slowly.  Fun seems to get in the way of working on them these days.  As I said the stain and varathane are on the newel post and the first portion of the handrail.  I love the color - dark walnut by minwax.  And the satin finish varathane has the perfect amount of shine for me.  I did 2 coats of stain and 4 of the varathane.   I will probably do one more coat once I have hte entire railing done


And if you look at the back you can see the primer on the baserail.  Woo Hoo.

Today after work - in addition to getting the rest of the cleaning up done after our impromptu cook out last night - I managed to get 2 coats of paint on 3 sides of the spindles that will go back on the first section of stairs.  I used Artist Canvas in the Behr with primer semi gloss.  It is the color in the laundry room on the cabinets, in the windowsills, and it is the crown molding in our dining room.  Hopefully before too long it will be the trim color throughput the house.


I think we have now bought every tool we could possibly need to remove the old treads.  We just bought
It is actually alot more powerful than I thought it would be.  We bought the sanding attachment to get in small places, a japenese type saw, and metal cutting blades to cut through some very stubborn nails and screws.  It has varaiable speeds, so I was able to teach grandson to sand with it on the lowest setting.  A 4 year old with a sander is a hilarious sight!!  And you get one very well sanded spot on a piece of wood.  Hey - it is what grandmothers are made for!!

Hope your DIY is going faster than mine!

Susan

Saturday, July 2, 2011

What DIY does to me

The stairs are progressing.  Sloooowly, but progressing.  I have stained the newel post and hand rail on the first section of stairs, hopefully tomorrow I can put the poly on those.  The tops of the first 7 treads are satined and varathaned.  The bottom portions of the treads are done - staining and varathaning except for one that had an oops.  Hopefully I can finish that tomorrow too.  And the lower section of the baserail inside the stair well have been de-glossed with Krud Kutter and the adhesion primer is on.  Woo  Hooo!!  Hopefully over the long week-end between bar-b-ques I can talk Honey into helping me pry off the existing treads.  I am totally amazed at the people in blog land who re-do their stairs in a week-end.  Oh my goodness - how do they do it!?!?

Of course I do have interuptions.  All the kids and the grandbaby spent most of the afternoon and evening here, leaving right at grandson's bedtime.  Of course, he was armed with chocolate from me - hee hee.  I just love it when they are all here!!  Even though I get nothing done - I would not have it any other way.  I did get to teach grandson how to use the paint can opener.  His parents were a little less than thrilled with that one.  So he and I opened every paint can we could find, only to hammer them closed and open them again.  He is quite the master at opening now!!

And some how between DIY, vacationing with the sister and daughter's birthday I have fallen behind on house work - way behind.  And I am usually a bit OCD about it.  For insatnce this (do not look if you have a weak stomach)
Yep - that is PART of the laundry I did today.  There are several scary aspects to this
1  - I was not done yet
2 - this does not include the massive amount of items hanging to dry
3- I can usually fold all my laundry on the folding counter in the laundry room
4 - This is the scariest - I did not even go upstairs to get daughter's, this is all mine and Honey's!!

What on earth was I thinking!!!

At least today's DIY had lots of dry time so the downstairs is looking rather back to normal.  Oh yeah - except for all the treads still spread through out the living room.

Does DIY do this to anyone else?

Hopefully I will remember to take some pics tomorrow and post on the ever so slow stair progress.

Susan