Search This Blog

Sunday, June 12, 2011

What I am up to....

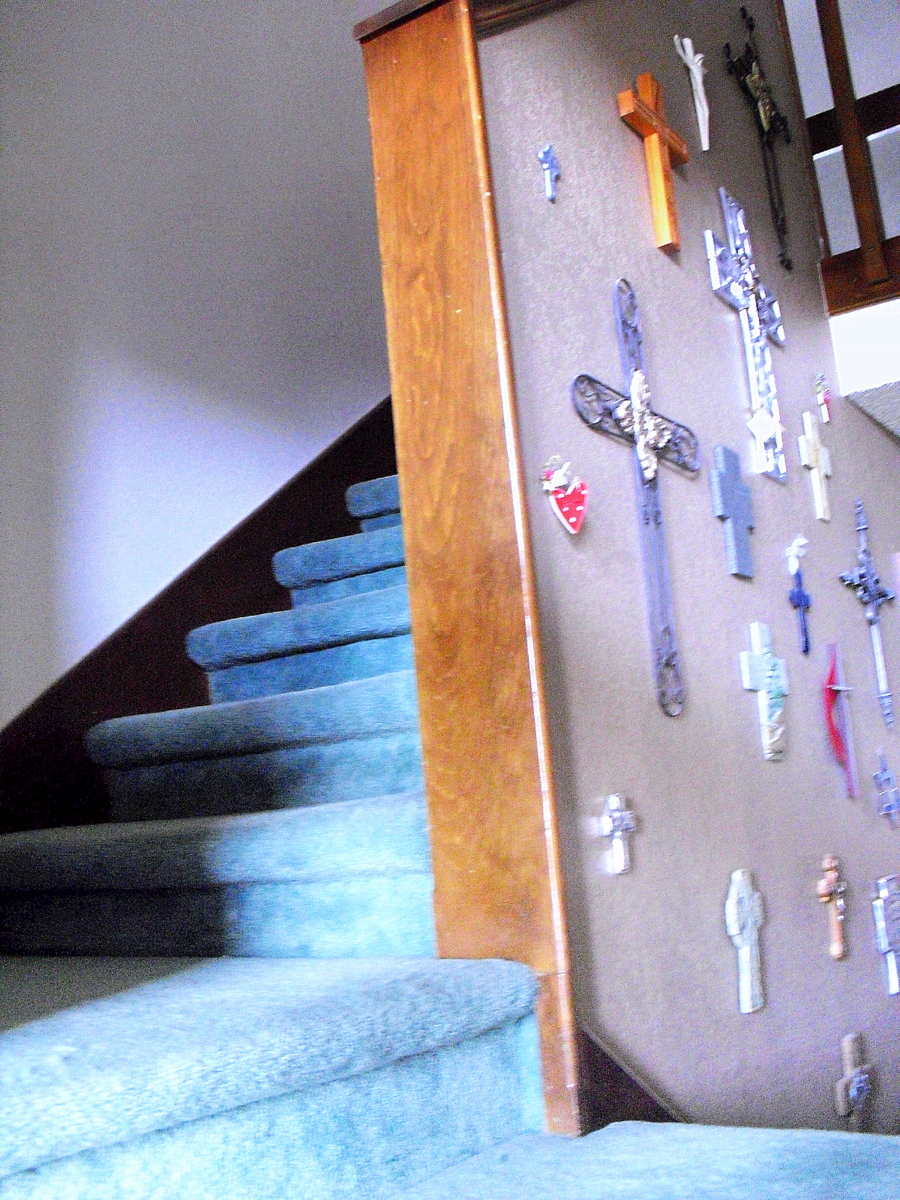
Well i have decided that if I am going to maintain this blog, I have to update it as I am working on projects.  I am way too slow to wait until I finish.  So here is what I am up to.  On Friday my stairs looked like this:


Now today - Sunday - they look like this:

Loverly!!!!

This is going to be a job!!!

There are obviously no bull nose treads hidden here!!!  And what looks like filler is actually the top of the wall - yep sheet rock.  I do believe that I have my work cut out for me!!!

I did find what I think is a really good deal on solid oak treads - special purchase at lowe's for $19.98 each.  Score  (if this is not a good deal please don't burst my bubble).  So those are now sanded, and have their 2nd coat of minwax dark walnut on them


OK - they look better than this - I am still struggling with my picture taking.

Unfortunately other than gathering supplies from quite a few stores all I got done was - removing carpet and padding, removing tack strips and staples. Staining new treads - no top coat yet.  Even though we are getting rid of the treads I wanted to remove all the tacks and staples because we have to use them until the new ones go up.

Oh and thank you to everyone who has responded to my questions about redoing their stairs!!!  There is so much valuable info here in blogland!!!


Susan

Wednesday, June 8, 2011

Ahhhh... It's the little things...........

..............that take a ridiculous amount of time!!!  Like those little bitty window sills. 

First - I must go back a few months to November.  We decided to take advantage of last year's tax break and replace all our windows.  Great decision, our utility bills dropped and we lost alot of draftiness in the house.  However - what a mess.  The walls are dinged up beyond belief and the caulking - oh my goodness - the messiest caulking job I have ever seen.  And the kicker, it was supposed to be paintable caulk - and of course it wasn't. 

In addition, because the old windows had major condensation problems and the drafts, the actual sills were in really bad shape.  So I thought quick fix and then I will feel sooo much better about these areas.  Uhm - wrong!!  I have been working on 4 window sills for days now.  AUGH!!!!!!

Here is the before
Notice the huge amounts - or rather globs - of caulk.  And how damaged the wood is. 

And then there is the oh so special one that my grandson clobbered with a toy elephant.


 Yep - hundreds of tiny little elephant hoove prints.  And of course this was right beside the front door.

So the first day was spent on 2 living room windows that I decided to paint instead of leave stained.  I sanded them a little first to smooth them out some.  (If you have never sanded inside the house you are missing a special kind of cleaning).  Next I painted them.  This is when I discovered it was not paintable caulk.  Oh joy.  So resanding - note, let the paint cure first.  Then I took paintable caulk and covered the old caulk.  Failure number 2.  Then I lightly, carefully sand the caulk.  Reapply paintable caulk, let it dry - again.  And paint.  Finally success.  So then I turn my attention to the wall by the window.  Sand the caulk, tape it off and apply new caulk.  Yep - should have waited for the paint on the sill to cure.  You guessed it.  Plucked that paint off - again.  Light sanding, touch up, and finally 3 days later - 2 painted window sills.

Since I had the paint out to paint inside the window I touched up all the walls that needed it.  Took forever, but looks much better.

After painting these 2 I decided to stain the ones by the front door.  This went much better.  I took an exacto knife and cut off a bunch of the caulk on the sill.  However I discovered that for me these little projects drive me up the wall.  Stain for about 2 minutes - then wait 4 to 6 hours to sand and recoat.  Which takes another whopping 5 minutes.  I am way too impatient for that!!  So of course I get distracted and the 4 hours turns into....  Well you know.  So now here we are on day 3 of the entry windows and


Finally - hoove prints are gone and last coat of poly is on, but I still have to paint the inside and deal with all the caulk - again.  So that will be 4 windows down and 13 to go.  I have got to find a better system for this!!

It's the little things...that will drive you zonkers!!!

Susan

Saturday, June 4, 2011

Laundry is for the birds!!!

Have you seen the incredible laundry rooms in blogland.  WOW!! 

Like this one http://www.centsationalgirl.com/2010/05/laundry-room-reveal/


cg laundry room after
And of course this incredible one
http://tatertotsandjello.blogspot.com/2010/09/my-beachy-laundry-room-reveal.html


Wowza!!!  If one of these were mine I would do everyone's laundry on our block.  Well maybe I would just invite them in to do thier laundry and bask in the beauty!!

So I decided that I should tackle my laundry room.  I cannot find the before pics.  But needless to say it was contractor grade white flat paint.  You know the type that is impossible to clean!  The cabinets were 1980's with icky stain - that reddish brown that seemed to dominate in the 80's  .  The floor was white and green linoleum.  The one thing in there the prior owner had done was to hang wall paper border.  Sail boats with laundry lines strung in between them.  Quit laughing - I am serious.  No seriously - stop laughing!

I took FOREVER deciding what I wanted to do in there.  I just knew that I wanted it to be cheerful and bright.  I finally found my inspiration piece.  A sweet little plate:


First I sanded, primed, and painted the cabinets.  After I pulled all the doors off, I found the blog that suggested numbering the cabinet doors with painter's tape so that you know which ones came from where.  That would have saved ALOT of time putting them back on.  Honey replaced all the hinges with brushed nickel - they were 80's brass.
(Notice the cute little clearance Easter basket  garbage can)

Then I painted the walls - Behr Marmalade Glaze.  The poor walls were so in need of good quality paint that all I had to do was hold the roller near the wall and the wall would suck the paint right off.  Just kidding - but the walls did absorb alot of paint.

Next on to the floor.  I knew I was not quite ready to tackle the wet saw, tile, and grout route.  So I bought peel and stick tile.  I did go with the thickest I could find with quite a nice warranty.

Now to accessorize:
On the wall facing the door my oldest daughter bought the sweetest little canvases for my birthday
Below that I hung an apron that my mom made when I was a little girl.  I had a matching little bitty one that was mine when I was about 3 - but I cannot find it (sadness)


On the wall with the folding area I hung a plaque - just added a brown ribbon


Same wall but behind the door
Tissue paper puffs - there are lots of tutorials in blogland for these and they are fun to make.  I also cut out several pieces of scrapbooking paper and threw them in a frame.


On the corner of the folding counter I put the inspiration plate, some little bird figures I found, and a pre-scentsy wax/oil burner that I have had for years.  But every room in my house must have a burner and I have not found one that goes well in here
On the washer and dryer wall I found another plaque that went with the room


And along the lines of the above picture - I scrubbed all the wood work down with TSP and then restained it.  That was a HUGE improvement.  The baseboards were in really bad shape.  I also replaced the doorknob with brushed nickel.

Now I have this pic of my grandson we snapped at the zoo to frame and hang somewhere on that wall:

I think it is perfect for this room!!
(Oh - and everyone can gaze at his adorableness!!)

I even switched out the light fixture myself.  Honey stood and watched to make sure I did not electricute myself.  But I did it all by myself-woo hoo.  And went from a one bulb, contractor fixture - brass with frosted glass to 180 watts of pure light:


On the floor is a stool that my mom and I made when I was about 6.  We painted it yellow and decopauged owls and morning glories on it.  After all these years of use - and I use stools alot - the designs were all but gone.  So I scraped the remaining decoupage off and sanded it down.  I painted it with the wall color, modge podge on a couple of birds that I cut out off scrapbooking paper, painted on tree branches, antiqued it, and then sealed it with clear matte spray paint.  I am so glad to keep it!


So there you have my cheerful new laundry room.  It makes me smile!
But no matter how cute the room is - Laundry is for the Birds!!!!


Thanks for looking!!

Susan

Linking up at:

Thursday, June 2, 2011

Field of Dreams and a HUGE thank you!!!

We all remember that movie - right?  If you build it, they will come.

So I hope I am not alone as a newbie blogger as I was worried that I would work on my blog for years and noone would ever read it.  Gulp - scary thought.

Well - I was blown away today!!!  Roeshel from the DIY Showoff  commented on my door!!!  I love her blog and am so in awe of all her skills - and she commented on my blog - woo hoo!!!  Total shock!!  And she featured my door on her blog.  I do not know what to say except

THANK YOU  Roeshel!!!

I will be on cloud 9 all day   week  month - again thanks!!!

Susan

Wednesday, June 1, 2011

Nonnie's China Cabinet

Several years ago my father gave me my maternal grandmother's tiny "extra china" china cabinet.  I was thrilled, not because it was a beautiful piece - it is not- nor was it in good condition.  But I remember as a child getting the everyday china out of it when we would visit and I remember playing on the hardwood floors beside it in the corner of her HUGE kitchen.  I have never used it as a china cabinet, but as a book/what-not shelf.  And to be honest, the poor old thing was sort of embarassing!  Wanna see?


Rather reddish finish

Close up of the front detail  and lots of chipping - and not in the cool shabby chic way

You can really see the damage here.

View from the side - note that the door will not shut on the drawer.

Ok - here is the bad part.  In my excitement to get this done, there are no "during" pictures.  But you probably all now the routine.  First I removed everything that I could.  Sanded it down to the bare wood anywhere I could and used stripper in the small details.  And then I stripped again.  Really old varnish is stubborn!!!    Then I sanded again with 220 grit.  Following Miss Mustard Seed's instructions I stained it with Minwax Dark Walnut Stain and several coats of minwax rub on poly in the satin.  I did not want it too glossy.  I removed the top detail piece because it was damaged.  I tried the soap on the drawer trick I had read about, but no luck.  So I sanded the side of the drawer until it fit.  Probably the very wrong thing to do, but it worked!!
And here she is now.

Ahhh - soo much better

Obviously I have not mastered staging or photography

Close up of the detailed area and the cute knobs - half price at Hobby Lobby.  No more damage!!

Close up of the new none-damaged leg!!

I redid the inside,too.  I found vintage looking scrapbooking paper and covered the books that stay in there and brought in some sentimental decorations.  My grandmother crocheted this sweet little coaster and this is the Bible my dad had from WWII

 - side note - I am not THAT old.  My dad was a teen in WWII and my parents were almost 50 when they had me.  Just sayin' -


And one last one so that you can see - the drawer is shut!!


I know this does not compare to so many of the INCREDIBLE projects out there.  But this one gave me alot of joy because of the wonderful woman it belonged to.  There were no markings on it to indicate how old it is but I know it is over 60 years old minimum.  And this was my first project to "move mountains in my home."  And it gave me the confidence to conquer that nasty front door!!!

I am linking to
Furniture Feature FridaysPhotobucketgrabtt

<script src="http://www.linkytools.com/thumbnail_linky_include.aspx?id=90674" type="text/javascript" ></script>